How to Winterize Outdoor Faucets: Simple Steps to Prevent Freezing!
Winterizing outdoor faucets is a crucial part of home maintenance as colder months approach. Outdoor faucets, also known as hose bibs, play a significant role in maintaining your garden and yard. However, without proper winterization, they can become vulnerable to freezing temperatures, leading to burst pipes and costly water damage.
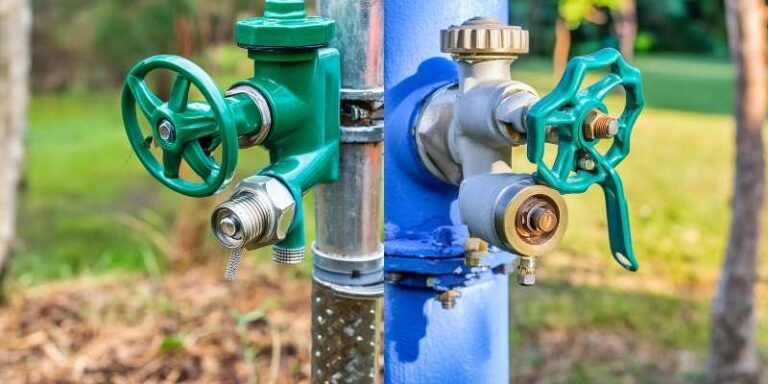
An outdoor faucet allows homeowners to access water for gardening, car washing, and other outdoor activities. Typically, these fixtures are designed to withstand various weather conditions, but extreme cold can still cause significant issues. Understanding the components of an outdoor faucet, including the spigot, handle, valve, and connected water pipe, is essential for effective winterization.
The main components of an outdoor faucet include the valve, spigot, handle, and the connected water pipe. Each part must be carefully maintained and protected to prevent freezing and subsequent damage during the winter months.
Explanation of why it’s important to winterize outdoor faucets
Winterizing outdoor faucets is a crucial home maintenance task that protects your plumbing system from the harsh effects of freezing temperatures. Neglecting to winterize outdoor faucets can lead to a range of problems, including burst pipes, water damage, and expensive repairs. Here’s a detailed explanation of why winterizing outdoor faucets is essential.
Preventing Frozen Pipes
One of the primary reasons for winterizing outdoor faucets is to prevent pipes from freezing. When water left in the pipes or faucet freezes, it expands, creating significant pressure within the pipe. This pressure can cause the pipe to crack or burst, leading to severe water damage once the ice thaws and water begins to leak. Freezing temperatures can affect any water pipes connected to outdoor faucets, including those running through walls, basements, or crawl spaces.
Table: Impact of Frozen Pipes
| Consequence | Description |
|---|---|
| Pipe Cracking | Expansion of frozen water can crack pipes, leading to leaks. |
| Burst Pipes | Severe pressure from expanding ice can cause pipes to burst. |
| Water Damage | Thawing ice in burst pipes can flood areas, causing significant damage. |
| Repair Costs | Fixing burst pipes and water damage can be expensive and time-consuming. |
Avoiding Costly Repairs
Repairing damage from frozen pipes can be costly and inconvenient. A burst pipe can result in flooding, which might damage floors, walls, furniture, and personal belongings. The cost of emergency plumbing services and repairs can add up quickly, especially if extensive water damage occurs. By winterizing outdoor faucets, you can significantly reduce the risk of such expensive repairs.
Table: Potential Costs of Not Winterizing Outdoor Faucets
| Repair/Service | Estimated Cost Range |
|---|---|
| Pipe Repair | $150 – $400 |
| Water Damage Restoration | $1,200 – $4,500 |
| Emergency Plumbing Services | $100 – $300 per hour |
| Total Potential Costs | $1,450 – $5,200+ |
Protecting the Entire Plumbing System
Winterizing outdoor faucets also helps protect the entire plumbing system. When an outdoor faucet or connected pipe freezes and bursts, it can create a chain reaction, affecting adjacent pipes and causing widespread damage. Properly winterizing these faucets ensures that the water supply to these fixtures is shut off and the pipes are drained, reducing the risk of freezing and subsequent damage to the rest of your plumbing.
Ensuring Continuous Water Supply
A frozen outdoor faucet can compromise your water supply. If pipes leading to outdoor faucets freeze, they can cause blockages that affect the overall water pressure and flow in your home. This can disrupt daily activities such as showering, cooking, and cleaning. Winterizing your outdoor faucets helps maintain consistent water supply and pressure throughout the winter months.
Easy Steps to Prevent Big Problems
Winterizing outdoor faucets involves straightforward steps that can prevent significant problems. The process typically includes turning off the water supply to the outdoor faucet, draining any remaining water, removing garden hoses, and installing insulated faucet covers. These simple actions provide an extra layer of protection against the freezing temperatures, ensuring your plumbing system remains intact and functional.
Table: Basic Steps to Winterize Outdoor Faucets
| Step | Action |
|---|---|
| Turn Off Water Supply | Shut off the indoor valve controlling the outdoor faucet. |
| Drain Remaining Water | Open the faucet to drain any water left in the pipes. |
| Remove Garden Hoses | Disconnect hoses to prevent trapped water from freezing. |
| Install Insulated Faucet Cover | Place a cover over the faucet to insulate against cold. |
Peace of Mind
Winterizing outdoor faucets provides homeowners with peace of mind. Knowing that your plumbing is protected from the potential damage caused by freezing temperatures allows you to enjoy the winter season without worrying about unexpected plumbing emergencies. This preventative measure is a small investment of time and effort that can save significant stress and expense in the long run.
Winterizing outdoor faucets is a vital step in home maintenance, safeguarding your plumbing system from the dangers of freezing temperatures. By preventing frozen pipes, avoiding costly repairs, protecting the entire plumbing system, and ensuring a continuous water supply, you can mitigate the risks associated with cold weather. Implementing simple winterization steps provides an added layer of protection and peace of mind, ensuring your home remains safe and functional throughout the winter months.
What Do I Need to Winterize an Outdoor Faucet?
Winterizing outdoor faucets requires a few essential tools and materials. These include a shut-off valve, an insulated faucet cover, a bucket, a wrench, and sometimes a lubricating spray. Having these items on hand will ensure you can effectively protect your faucets from the harsh winter weather.
First, identify the shut-off valve inside your house, usually located in the basement or crawl space. This valve controls the water flow to your outdoor faucets and is critical for the winterization process. You may need a wrench to turn off the valve securely. Additionally, an insulated faucet cover provides an extra layer of protection against freezing temperatures.
Gathering these materials in advance can save you from a last-minute scramble when cold weather hits. Ensuring you have everything ready will make the winterization process smoother and more efficient.
Definition and purpose of an outdoor faucet
Definition of an Outdoor Faucet
An outdoor faucet, also commonly known as a hose bib, spigot, or garden faucet, is a plumbing fixture installed on the exterior of a building. Its primary function is to provide a convenient water source outside the home for various activities such as gardening, car washing, filling pools, and other outdoor tasks. Outdoor faucets are typically made from durable materials like brass or stainless steel to withstand outdoor elements and frequent use.
Purpose of an Outdoor Faucet
The purpose of an outdoor faucet extends beyond merely providing water outside the home. Here are some of the primary uses and benefits:
- Gardening and Landscaping: Outdoor faucets are essential for watering gardens, lawns, and flower beds. They facilitate the use of garden hoses, sprinklers, and other irrigation systems.
- Cleaning and Maintenance: They provide a water source for cleaning outdoor surfaces, such as driveways, patios, decks, and siding. Outdoor faucets make it easy to wash cars, bicycles, and outdoor furniture.
- Recreational Activities: They are useful for filling pools, hot tubs, and water play equipment. An outdoor water source is also convenient for pets, providing drinking water or washing areas for animals.
- Convenience: Having a water source outside eliminates the need to run hoses through windows or doors, preventing potential damage and maintaining indoor cleanliness.
Benefits of an Outdoor Faucet
- Accessibility: Easily accessible water supply for various outdoor tasks without needing to bring water from inside.
- Efficiency: Speeds up outdoor chores and projects by providing a dedicated water source right where it’s needed.
- Versatility: Can be used with multiple attachments, such as spray nozzles, sprinklers, and pressure washers, for different applications.
- Durability: Designed to withstand outdoor conditions, including temperature fluctuations, sun exposure, and moisture.
Maintenance and Protection
While outdoor faucets are built to endure harsh conditions, they still require proper maintenance, especially during winter. Winterizing your outdoor faucet is crucial to prevent freezing, which can lead to burst pipes and costly repairs. Ensuring the faucet and connected pipes are adequately insulated and drained can protect your plumbing system from the damaging effects of cold weather.
Outdoor faucets are indispensable for homeowners, providing a reliable water source for a wide range of activities and maintenance tasks. Understanding the components and purposes of outdoor faucets helps in proper maintenance and efficient usage, ensuring their longevity and functionality.
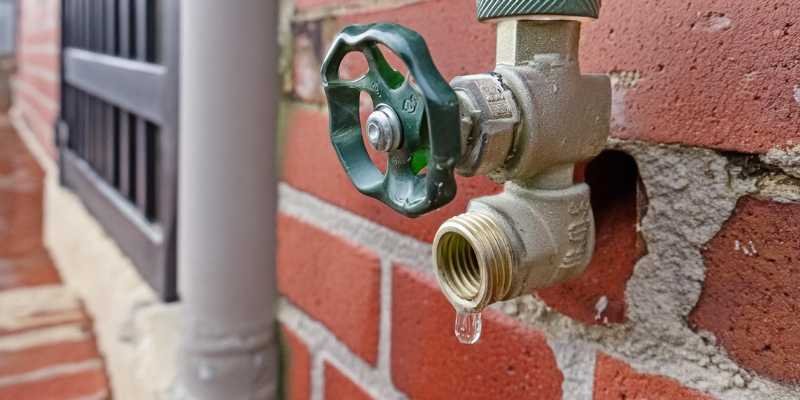
Components of an Outdoor Faucet
Understanding the components of an outdoor faucet is essential for effective winterization. An outdoor faucet, also known as a hose bib or spigot, consists of several key parts:
- Spigot/Nozzle: The spigot is the outlet where water flows out. It is designed to attach to garden hoses and other watering devices.
- Handle: The handle controls the flow of water. It can be a lever-style or wheel-shaped handle that turns to open and close the valve.
- Valve: The valve regulates the water flow from the pipe to the spigot. It can be a ball valve or gate valve, each offering different levels of control and sealing capabilities.
- Stem/Stem Washer: The stem extends from the handle to the valve, and the stem washer provides a tight seal to prevent leaks when the faucet is closed.
- Packing Nut: The packing nut holds the stem washer in place and prevents leaks around the stem.
- Water Pipe Connection: This connects the outdoor faucet to the indoor plumbing system. It is typically made of copper, PVC, or PEX.
Table 1: Components of an Outdoor Faucet
| Component | Description |
|---|---|
| Spigot/Nozzle | The outlet where water flows out, attaches to hoses. |
| Handle | Controls the water flow, available in lever or wheel styles. |
| Valve | Regulates water flow, can be ball or gate type. |
| Stem/Stem Washer | Extends from the handle to the valve, seals when faucet is off. |
| Packing Nut | Holds the stem washer in place, prevents leaks around the stem. |
| Water Pipe | Connects faucet to indoor plumbing, usually copper or PVC. |
What Do I Need to Winterize an Outdoor Faucet?
Winterizing an outdoor faucet is crucial to prevent freezing, which can lead to burst pipes and costly repairs. The process requires specific tools and materials to ensure your outdoor faucet is adequately protected against the harsh winter weather. Here’s a detailed look at what you need to winterize an outdoor faucet effectively.
Essential Tools and Materials
To winterize your outdoor faucet, gather the following items:
- Shut-off Valve: This valve, usually located indoors, controls the water supply to the outdoor faucet. It must be turned off to stop water flow during winterization.
- Insulated Faucet Cover: These covers provide an extra layer of insulation, protecting the faucet from freezing temperatures.
- Bucket: Used to catch and remove any residual water from the faucet and pipes.
- Wrench: A wrench may be needed to turn off the shut-off valve securely or to make any necessary adjustments.
- Lubricating Spray: Useful for maintaining the moving parts of the faucet, ensuring they do not seize up in cold weather.
- Foam Pipe Insulation: Wraps around exposed pipes to provide additional insulation and prevent freezing.
- Heat Tape: Electrically powered tape that can be wrapped around pipes to keep them warm in extremely cold temperatures.
Table: Materials Needed for Winterizing an Outdoor Faucet
| Material | Purpose |
|---|---|
| Shut-off Valve | Stops water flow to the outdoor faucet. |
| Insulated Faucet Cover | Provides insulation to protect the faucet from freezing. |
| Bucket | Catches residual water from faucet and pipes. |
| Wrench | Turns off the shut-off valve and makes adjustments. |
| Lubricating Spray | Maintains moving parts of the faucet. |
| Foam Pipe Insulation | Insulates exposed pipes to prevent freezing. |
| Heat Tape | Keeps pipes warm in extremely cold temperatures. |
Steps to Winterize Your Outdoor Faucet
1. Turn Off the Shut-off Valve Locate the indoor shut-off valve that controls the water supply to your outdoor faucet. This valve is usually found in the basement, crawl space, or utility room. Turn it off to stop the water flow to the outdoor faucet. This step is crucial to ensure no water remains in the pipes leading to the outdoor faucet, which could freeze and cause damage.
2. Drain the Faucet Open the outdoor faucet to drain any remaining water. Place a bucket under the faucet to catch any residual water. Allow the water to flow until it stops completely. Draining the faucet ensures that no water is left inside that could freeze and expand, causing the faucet or connected pipes to burst.
3. Remove Garden Hoses Detach any garden hoses connected to the faucet. Leaving hoses attached can trap water in the faucet and pipes, increasing the risk of freezing. Store the hoses in a garage or shed to protect them from the elements.
4. Install an Insulated Faucet Cover Place an insulated cover over the faucet. These covers are designed to fit securely over the faucet and provide protection against freezing temperatures. They can be found at most hardware stores and are typically easy to install.
5. Wrap Exposed Pipes with Foam Insulation Use foam pipe insulation to wrap any exposed pipes connected to the outdoor faucet. This additional layer of insulation helps keep the pipes warm. Foam insulation can be easily cut to size and secured around the pipes with tape or ties.
6. Use Heat Tape if Necessary In areas with extremely cold temperatures, consider using heat tape around exposed pipes for extra protection. Heat tape is electrically powered and keeps the pipes warm, preventing freezing. Be sure to follow the manufacturer’s instructions for safe installation.
7. Check for Leaks Ensure there are no leaks around the faucet or shut-off valve. Any leaks should be repaired before winter sets in. Leaks can allow water to enter the pipes, which can then freeze and cause damage.
8. Secure All Connections Make sure all connections are tight and secure to prevent any water from entering and freezing. This includes checking the connection between the faucet and the pipe as well as the insulated cover.
9. Store Necessary Tools and Materials Keep all tools and materials in a convenient location for future use. This ensures you are prepared to repeat the winterization process next year or make any necessary adjustments during the winter.
10. Regular Inspection Periodically check the faucet and insulated cover throughout the winter to ensure they remain secure and in good condition. Regular inspections can help you catch any issues early and prevent significant damage.
By gathering the necessary tools and materials and following these steps, you can effectively winterize your outdoor faucet. This process protects your plumbing system from freezing temperatures, helping you avoid costly repairs and ensuring your outdoor faucet remains in good condition throughout the winter.
The Most Basic Method for Winterizing Outdoor Faucets
Winterizing outdoor faucets is an essential maintenance task to protect your home’s plumbing from freezing temperatures. The basic method for winterizing outdoor faucets involves a few straightforward steps that can prevent costly repairs and water damage. Here’s a detailed guide to the most basic method for winterizing outdoor faucets.
Step-by-Step Guide to Winterizing Outdoor Faucets
- Turn Off the Water Supply The first step in winterizing your outdoor faucets is to turn off the water supply to the outdoor faucet. This is typically done via a shut-off valve located inside your home, often in the basement, crawl space, or utility room. Steps to Turn Off the Water Supply:
- Locate the shut-off valve that controls the water flow to the outdoor faucet.
- Turn the valve clockwise to close it. For lever-style valves, turn the lever so it is perpendicular to the pipe.
- Ensure the valve is tightly closed to stop all water flow to the outdoor faucet.
- Open the Outdoor Faucet After shutting off the indoor valve, open the outdoor faucet to allow any remaining water to drain out. This step is crucial to ensure no water is left in the pipes that could freeze. Steps to Open the Outdoor Faucet:
- Turn the handle of the outdoor faucet counterclockwise to open it fully.
- Leave the faucet open to let all the water drain out.
- Place a bucket under the faucet to catch any residual water.
- Disconnect and Store Garden Hoses Leaving garden hoses connected to outdoor faucets during winter can trap water in the faucet and pipes, increasing the risk of freezing and damage. Always disconnect and store garden hoses before freezing temperatures set in. Steps to Disconnect and Store Hoses:
- Unscrew the hose from the outdoor faucet.
- Drain any water remaining in the hose by holding it vertically and allowing gravity to do the work.
- Coil the hose neatly and store it in a garage or shed to protect it from the elements.
- Install an Insulated Faucet Cover Installing an insulated cover over the outdoor faucet adds an extra layer of protection against freezing temperatures. These covers are designed to fit securely over the faucet, providing insulation to keep it warm. Steps to Install an Insulated Faucet Cover:
- Purchase an insulated cover from a hardware store. These are often made of foam or hard plastic with a secure fastening mechanism.
- Place the cover over the outdoor faucet, ensuring it fits snugly.
- Secure the cover according to the manufacturer’s instructions, typically using an adjustable strap or hook.
- Check for Leaks and Ensure Proper Sealing After completing the previous steps, check for any leaks around the faucet and the shut-off valve. Ensuring there are no leaks is crucial to prevent water from entering the pipes and freezing. Steps to Check for Leaks:
- Inspect the outdoor faucet and the shut-off valve for any signs of dripping or moisture.
- Tighten any loose connections if necessary.
- Apply plumber’s tape around the connections if leaks persist.
By following this basic method for winterizing outdoor faucets, you can protect your plumbing system from the damaging effects of freezing temperatures. This simple and cost-effective process involves turning off the water supply, draining the faucet, disconnecting hoses, and installing an insulated cover. Taking these steps ensures your outdoor faucet and pipes remain in good condition, preventing costly repairs and water damage.
What you should do now to winterize your outside faucets.
As temperatures begin to drop, it’s essential to start the winterization process for your outdoor faucets. Begin by inspecting each faucet for leaks or damage. Any issues should be addressed promptly to ensure the faucet can be properly winterized.
After inspection, follow the basic winterizing steps: turn off the water supply, drain the faucets, remove any hoses, and install faucet covers. Additionally, consider adding an extra layer of protection by wrapping the exposed pipes with foam insulation. This can help keep the pipes warmer and further reduce the risk of freezing.
It’s also a good idea to check your shut-off valve to ensure it’s working correctly. A faulty valve can lead to water remaining in the pipes, which can freeze and cause damage. By taking these steps now, you can prevent costly repairs and ensure your outdoor faucets are protected throughout the winter.
Outside Faucet Winterizing Checklist
A comprehensive checklist can help ensure you don’t miss any steps when winterizing your outdoor faucets:
- Inspect faucets for leaks or damage.
- Turn off the indoor shut-off valve.
- Open the outdoor faucet to drain remaining water.
- Remove and store garden hoses.
- Install insulated faucet covers.
- Wrap exposed pipes with foam insulation.
- Check the shut-off valve for proper function.
- Ensure all connections are secure.
- Test the faucet to ensure no water flow.
- Store necessary tools and materials for future use.
Following this checklist can provide peace of mind that your outdoor faucets are adequately protected against freezing temperatures.
Outside Faucet Spring Re-open Checklist
When the winter months are over, it’s time to prepare your outdoor faucets for spring. Follow these steps to ensure a smooth transition:
- Remove the insulated faucet covers.
- Reattach any garden hoses.
- Turn on the indoor shut-off valve.
- Check for any leaks or damage.
- Open the outdoor faucet and ensure water flows freely.
- Inspect the faucet and pipes for any signs of winter damage.
- Replace any damaged components.
- Test all outdoor faucets to ensure they are working correctly.
By following this checklist, you can ensure your outdoor faucets are ready for use in the warmer months.
What Else Can I Do to Winterize My Outdoor Faucets?
In addition to the basic steps, there are several other methods you can use to winterize your outdoor faucets. Installing frost-free faucets is one option. These faucets are designed to prevent freezing by keeping the water flow deeper inside the house, where temperatures are warmer.
Another method is to use heat tape. This electrically powered tape wraps around pipes and keeps them warm, preventing freezing. Heat tape is especially useful in areas with extremely cold temperatures.
Additionally, you can add an extra layer of protection by using insulated faucet socks. These socks fit over the faucet and provide insulation against the cold. Combining these methods can offer complete protection for your outdoor faucets during the winter.
Description of the water pipe connected to the outdoor faucet
The water pipe connected to the outdoor faucet plays a crucial role in maintaining water flow. This pipe runs from the indoor plumbing system to the outdoor faucet, allowing you to access water outside your home. It’s typically made of durable materials like copper or PVC to withstand various weather conditions.
During winter, this pipe is susceptible to freezing if not properly insulated. Freezing can cause the pipe to burst, leading to water leaks and potential flooding. Ensuring the pipe is properly drained and insulated is essential for preventing these issues.
Proper maintenance of the water pipe is critical for the overall function of your outdoor faucet. Regular inspections and winterizing steps can help keep the pipe in good condition and prevent costly repairs.
The role of the water pipe in maintaining water flow
The water pipe’s primary function is to deliver water from your home’s plumbing system to the outdoor faucet. This pipe ensures a steady flow of water for gardening, cleaning, and other outdoor activities. However, during winter, maintaining this water flow can be challenging due to the risk of freezing.
To prevent freezing, it’s essential to drain the pipe completely before winter sets in. This removes any trapped water that could freeze and expand, causing the pipe to burst. Additionally, insulating the pipe can help keep it warm and prevent freezing.
Properly maintaining the water pipe is crucial for ensuring a consistent water flow and preventing damage during the winter months.
Potential risks of leaving a garden hose attached to an outdoor faucet during cold weather
Leaving a garden hose attached to an outdoor faucet during cold weather can lead to several issues. One of the primary risks is that water trapped in the hose can freeze and expand, putting pressure on the faucet and connected pipes. This pressure can cause the pipes to burst, leading to significant water damage.
Additionally, a connected hose can prevent the faucet from draining properly. This trapped water increases the risk of freezing inside the faucet and the pipe, further increasing the likelihood of damage. Removing the hose is a simple step that can prevent these issues.
It’s essential to disconnect and store garden hoses indoors during the winter to protect your outdoor faucets and plumbing system from freezing temperatures.
Winterizing techniques for outdoor faucets
There are several techniques you can use to winterize your outdoor faucets. One common method is to install frost-free faucets. These faucets are designed to prevent freezing by keeping the water flow deeper inside the house, where temperatures are warmer.
Another effective technique is to use heat tape. This electrically powered tape wraps around pipes and keeps them warm, preventing freezing. Heat tape is especially useful in areas with extremely cold temperatures.
Additionally, using insulated faucet covers and foam pipe insulation can provide an extra layer of protection. Combining these techniques can offer comprehensive protection for your outdoor faucets during the winter months.
Overview of different methods for protecting outdoor faucets during winter months
Protecting outdoor faucets during the winter involves several methods. One of the most effective is to install frost-free faucets, which are designed to prevent freezing by keeping the water flow deeper inside the house.
Another method is to use heat tape. This tape wraps around pipes and keeps them warm, preventing freezing. It’s particularly useful in extremely cold temperatures.
Additionally, using insulated faucet covers and foam pipe insulation can provide an extra layer of protection. Combining these methods can help ensure your outdoor faucets are protected from freezing and potential damage.
Risks associated with frozen pipes and how they can be prevented
Frozen pipes can lead to significant damage and costly repairs. When water inside a pipe freezes, it expands, causing the pipe to burst. This can lead to water leaks and flooding, resulting in expensive water damage to your home.
Preventing frozen pipes involves several steps. First, ensure all outdoor faucets are properly drained and insulated. Use heat tape on exposed pipes to keep them warm. Additionally, keeping the indoor temperature consistent and above freezing can help prevent pipes from freezing.
Regular maintenance and winterizing steps can significantly reduce the risk of frozen pipes and the associated damage.
Signs that your pipes may be frozen
Recognizing the signs of frozen pipes is crucial for preventing damage. One common sign is a lack of water flow from the faucet. If you turn on the faucet and no water comes out, it’s a strong indicator that the pipe is frozen.
Another sign is frost on the exterior of the pipe. If you see frost or ice buildup on the pipe, it’s likely frozen. Additionally, a noticeable drop in water pressure can indicate a frozen pipe.
If you suspect your pipes are frozen, take immediate action to thaw them and prevent further damage.
Steps to Winterize Your Outdoor Spigots
Step 1: Inspect Your Faucets for Leaks
The first step in winterizing your outdoor spigots is to inspect them for leaks. Check the faucet and connected pipes for any signs of damage or leaks. Addressing these issues before winter can prevent further damage and ensure the faucet can be properly winterized.
Step 2: Drain Your Spigots and Pipes
After inspecting the faucets, the next step is to drain them. Turn off the indoor shut-off valve and open the outdoor faucet to drain any remaining water. This step is crucial as it prevents water from freezing inside the pipes and causing them to burst.
Step 3: Add Outdoor Faucet Covers
The final step is to add outdoor faucet covers. These covers provide an extra layer of insulation against freezing temperatures. They are easy to install and can significantly reduce the risk of frozen pipes.
How to Cover an Outside Faucet Properly
Covering an outside faucet properly involves a few simple steps. First, purchase an insulated faucet cover from a hardware store. These covers are designed to fit over the faucet and provide insulation against the cold.
Next, ensure the faucet is dry and free of any leaks. Place the cover over the faucet and secure it according to the manufacturer’s instructions. This usually involves tightening a drawstring or securing a strap around the faucet.
Properly covering your faucet can prevent freezing and protect your plumbing system during the winter.
How Outdoor Faucet Covers Work
Outdoor faucet covers work by providing insulation against freezing temperatures. These covers are typically made of foam or other insulating materials that trap heat and prevent the faucet from freezing.
When installed correctly, faucet covers create a barrier between the cold air and the faucet. This barrier helps maintain a consistent temperature around the faucet, reducing the risk of freezing.
Using faucet covers is a simple and effective way to protect your outdoor faucets during the winter months.
Is it Better to Cover Outside Faucets or Let them Drip?
Covering outside faucets is generally more effective than letting them drip. While allowing faucets to drip can prevent freezing by keeping water moving, it can also lead to water waste and higher utility bills.
Using faucet covers provides a more efficient solution. Covers insulate the faucet and prevent freezing without wasting water. Additionally, covers are easy to install and provide a reliable layer of protection against cold temperatures.
How to Properly Drain an Outdoor Faucet
Properly draining an outdoor faucet involves several steps. First, turn off the indoor shut-off valve that controls the water flow to the faucet. Next, open the outdoor faucet to release any remaining water.
To ensure all water is drained, you may need to use a bucket to catch any residual water. Once the water is drained, remove any attached garden hoses and install an insulated faucet cover for extra protection.
Draining the faucet is a crucial step in preventing freezing and potential damage to your plumbing system.
How to Prevent Your Water Pipes and Meter From Freezing
Preventing your water pipes and meter from freezing involves several steps. First, ensure all outdoor faucets are properly drained and insulated. Use heat tape on exposed pipes to keep them warm.
Additionally, keep the indoor temperature consistent and above freezing. Insulate pipes in unheated areas, such as basements and crawl spaces, to prevent freezing. Regularly check your water meter for any signs of freezing or damage.
Taking these steps can help prevent frozen pipes and ensure your plumbing system remains in good condition throughout the winter.
FAQs: Winterize Your Outside Faucets
When Should I Start Preparing My Lawn Faucets for Winter?
Start preparing your lawn faucets for winter before the first frost. This ensures you have ample time to complete the winterization process and protect your faucets from freezing temperatures.
What Steps Should I Take to Winterize My Lawn Faucets?
To winterize your lawn faucets, turn off the indoor shut-off valve, drain the faucet, remove any garden hoses, and install an insulated faucet cover. Consider wrapping exposed pipes with foam insulation for added protection.
Can I Use Any Materials to Insulate My Lawn Faucets?
Yes, you can use various materials to insulate your lawn faucets. Foam covers, faucet socks, and heat tape are all effective options for providing insulation against freezing temperatures.
What If I Forget to Prepare My Lawn Faucets for Winter?
If you forget to prepare your lawn faucets for winter, they are at risk of freezing and bursting. If you suspect your faucets have frozen, take immediate action to thaw them and inspect for any damage.
When to Winterize Outdoor Faucets?
Winterize outdoor faucets before the first frost of the season. This ensures they are adequately protected before temperatures drop and freezing becomes a risk.
How to Winterize Outdoor Faucets and Outdoor Spigot?
To winterize outdoor faucets and spigots, turn off the indoor shut-off valve, drain the faucets, remove garden hoses, and install insulated covers. Wrapping exposed pipes with foam insulation can provide extra protection.
What Is a Frost-Free Faucet?
A frost-free faucet is designed to prevent freezing by keeping the water flow deeper inside the house. This design helps protect the faucet and connected pipes from freezing temperatures.
How To Know If Your Outdoor Faucet Has Frozen?
If your outdoor faucet has frozen, you may notice a lack of water flow, frost on the exterior of the pipe, or a significant drop in water pressure. Immediate action is needed to thaw the faucet and prevent further damage.
Final Thoughts
Preparing for winter by winterizing outdoor faucets is essential to avoid the frustrating and expensive consequences of frozen pipes and water damage. By taking proactive steps before cold weather strikes, you can ensure your outdoor faucets and plumbing system remain protected throughout the winter months. Winterization and proper insulation can save you from the costly repairs associated with burst pipes and flooding.