Why Does One Sprinkler Zone Have Low Water Pressure: Discover Solutions Now
Experiencing low water pressure in one sprinkler zone can be frustrating and detrimental to your lawn and garden’s health. Proper water pressure is essential to ensure your plants receive adequate hydration, promoting a lush and vibrant landscape. So, why does one sprinkler zone have low pressure? In this blog post, we will explore potential causes of low water pressure in a sprinkler zone, provide steps to diagnose the problem, and offer effective solutions to restore optimal performance.
Importance of Proper Water Pressure in Sprinkler Systems
Maintaining proper water pressure in sprinkler systems is crucial for the health of your lawn and garden, as well as the efficiency and longevity of the irrigation system itself. Proper water pressure ensures uniform water distribution, conserves water, prevents damage to the system, and promotes optimal plant growth. Below, we delve into the importance of proper water pressure, supported by detailed explanations and tables.
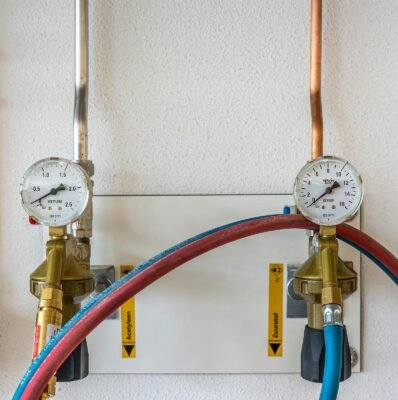
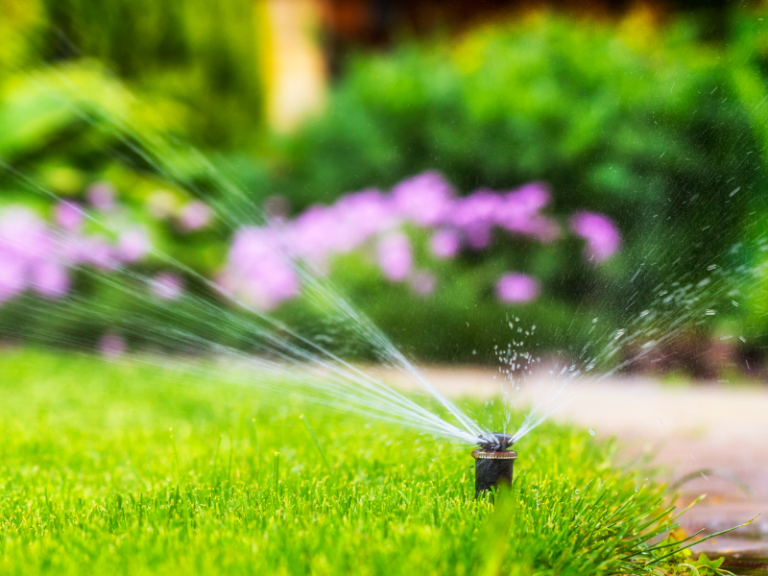
Image by Mike van Schoonderwalt from pexels
Ensures Uniform Water Distribution
Uniform water distribution is vital for maintaining a healthy and aesthetically pleasing lawn. Proper water pressure ensures that each sprinkler head delivers the right amount of water to cover its designated area without leaving dry spots or over-watered areas.
Effects of Uniform Water Distribution:
- Healthy Plant Growth: Even watering promotes consistent growth and prevents areas of drought stress.
- Aesthetic Appeal: A uniformly green and lush lawn enhances the visual appeal of your property.
- Prevents Overwatering: Proper pressure prevents some areas from receiving too much water, which can lead to runoff and water wastage.
| Pressure Level | Distribution Quality | Effect on Lawn |
| Proper Pressure | Uniform distribution, no dry spots | Consistent, healthy growth, visually appealing |
| Low Pressure | Uneven distribution, dry patches | Patchy growth, drought stress |
| High Pressure | Mist and runoff, water wastage | Overwatering, potential root rot |
Conserves Water
Efficient water use is a key benefit of maintaining proper pressure in your sprinkler system. Properly adjusted pressure minimizes water waste and helps conserve this valuable resource.
Benefits of Water Conservation:
- Cost Savings: Reduced water usage translates to lower utility bills.
- Environmental Impact: Conserving water helps protect the environment and ensures sustainable use of natural resources.
- Regulatory Compliance: Adhering to water usage regulations prevents potential fines and penalties.
| Pressure Level | Water Usage | Environmental Impact |
| Proper Pressure | Optimal usage, minimal waste | Positive, sustainable resource management |
| Low Pressure | Inadequate coverage, potential for excess watering | Inefficient, potential overuse of water |
| High Pressure | Excessive water flow, runoff | Negative, contributes to water wastage |
Prevents Damage to the System
Maintaining proper water pressure helps prevent damage to your sprinkler system components, thereby extending their lifespan and reducing maintenance costs.
Potential Damage from Incorrect Pressure:
- High Pressure: Can cause sprinkler heads to blow off, pipes to burst, and increased wear on valves and fittings.
- Low Pressure: Can lead to inadequate coverage, causing the system to work harder and potentially overheat.
| Pressure Level | Potential Damage | Maintenance Implications |
| Proper Pressure | Minimal wear and tear, longer component lifespan | Lower maintenance costs, fewer repairs |
| Low Pressure | System overworks, potential for overheating | More frequent repairs, possible component failure |
| High Pressure | Blow-offs, burst pipes, valve damage | Higher repair costs, increased maintenance frequency |
Promotes Optimal Plant Growth
Plants require a consistent and appropriate amount of water to thrive. Proper water pressure ensures that your plants receive the right amount of water, promoting healthy growth and reducing the risk of disease.
Effects on Plant Health:
- Consistent Moisture Levels: Proper pressure delivers water evenly, maintaining consistent soil moisture.
- Disease Prevention: Avoids waterlogging and root rot, which can occur from overwatering.
- Nutrient Uptake: Adequate watering helps plants absorb nutrients more efficiently from the soil.
| Pressure Level | Effect on Plant Growth | Risk of Disease |
| Proper Pressure | Optimal growth, consistent moisture levels | Low risk of water-related diseases |
| Low Pressure | Inconsistent watering, drought stress | Higher risk of disease due to uneven watering |
| High Pressure | Overwatering, potential root rot | Increased risk of waterlogging and root diseases |
Summary of Importance
Maintaining proper water pressure in your sprinkler system is essential for:
- Uniform Water Distribution: Ensuring every part of your lawn receives adequate moisture.
- Water Conservation: Minimizing water waste and reducing utility costs.
- System Longevity: Preventing damage to the system, thereby lowering maintenance costs.
- Optimal Plant Growth: Promoting healthy and disease-free plants.
| Aspect | Benefit | Impact |
| Uniform Distribution | Consistent moisture levels | Healthy, lush lawn |
| Water Conservation | Reduced water usage and costs | Positive environmental impact |
| System Longevity | Less wear and tear, fewer repairs | Lower maintenance costs |
| Optimal Plant Growth | Adequate watering, better nutrient uptake | Healthy, disease-free plants |
Proper water pressure is a cornerstone of effective irrigation system management. By ensuring that your sprinkler system operates within the recommended pressure range, you can enjoy a vibrant lawn, reduce water usage, and extend the lifespan of your system components. Regular maintenance and pressure checks are essential practices for achieving these benefits.
Common Causes of Why Does One Sprinkler Zone Have Low Water Pressure
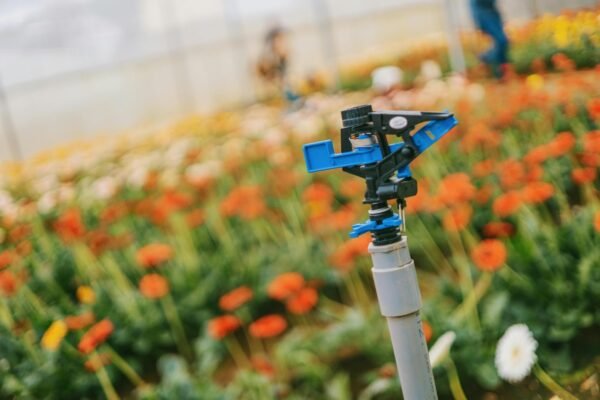
Low water pressure in a single sprinkler zone can be caused by various issues. Understanding these common causes can help you troubleshoot and resolve the problem effectively. Below are detailed explanations of these causes, including helpful tables for reference.

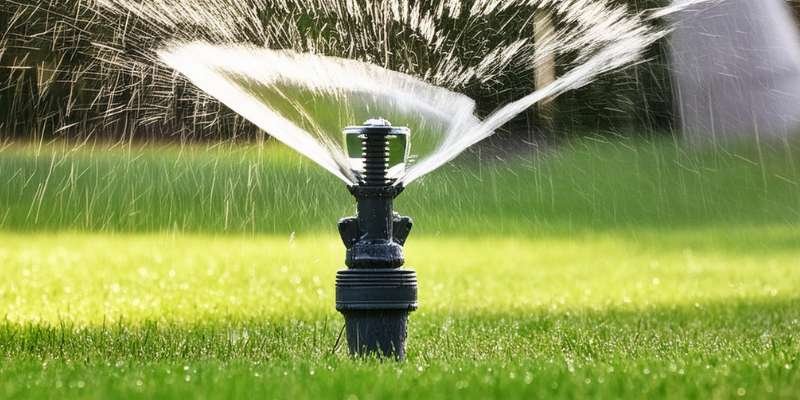
Image by Jonathan Cooper from pexels
Clogged Sprinkler Heads
Sprinkler heads can become clogged with dirt, debris, or mineral deposits, restricting water flow.
How Clogs Occur:
- Debris: Leaves, grass clippings, and soil can enter the sprinkler head.
- Mineral Buildup: Hard water can leave mineral deposits over time.
- Insects: Small insects can build nests inside the heads.
Signs of Clogged Sprinkler Heads:
- Uneven spray patterns
- Weak water flow
- Sprinkler head not popping up
| Clog Source | Description | Prevention |
| Debris | Leaves, grass, and soil enter heads | Regularly inspect and clean heads |
| Mineral Buildup | Hard water deposits minerals | Use a water softener or filter |
| Insects | Insects nest inside the heads | Use insect-proof covers |
Pipe Leaks or Breaks
Leaks or breaks in the irrigation pipes can significantly reduce water pressure in a specific zone.
Causes of Pipe Leaks:
- Tree Roots: Roots can grow into and break pipes.
- Ground Movement: Shifting soil can stress and crack pipes.
- Aging Pipes: Old pipes may become brittle and break.
Signs of Leaks:
- Wet spots or pooling water in the lawn
- Reduced water pressure in specific zones
- Noticeable hissing sounds from the ground
| Leak Cause | Description | Prevention |
| Tree Roots | Roots grow into and break pipes | Regularly inspect and prune nearby trees |
| Ground Movement | Soil shifts and stresses pipes | Ensure proper pipe installation depth |
| Aging Pipes | Old, brittle pipes crack | Replace old pipes with durable materials |
Valve Issues
Partially closed or malfunctioning valves can restrict water flow to a sprinkler zone.
Common Valve Problems:
- Partially Closed Valve: Not fully opened, restricting flow.
- Damaged Valve: Internal components wear out or break.
- Electric Valve Malfunction: Wiring or solenoid issues.
Signs of Valve Problems:
- No water flow in the affected zone
- Inconsistent water pressure
- Audible clicking or humming sounds
| Valve Problem | Description | Solution |
| Partially Closed Valve | Valve not fully opened, restricting flow | Fully open the valve |
| Damaged Valve | Internal wear or breakage | Replace the valve |
| Electric Valve Malfunction | Wiring or solenoid issues | Inspect and repair wiring or solenoid |
Pressure Regulator Problems
Pressure regulators maintain consistent water pressure. Malfunctions can cause low pressure in one or more zones.
Issues with Pressure Regulators:
- Incorrect Settings: Regulator set too low.
- Internal Wear: Components wear out over time.
- Blockages: Debris inside the regulator.
Signs of Regulator Problems:
- Consistently low pressure across multiple zones
- Fluctuating water pressure
- Visible damage or debris in the regulator
| Regulator Issue | Description | Solution |
| Incorrect Settings | Regulator set too low | Adjust to correct pressure range (30-50 psi) |
| Internal Wear | Components wear out | Replace the regulator |
| Blockages | Debris inside the regulator | Clean or replace the regulator |
Zoning and System Design Flaws
Poor system design or improper zoning can lead to uneven water pressure and distribution.
Common Design Issues:
- Too Many Heads per Zone: Excessive heads reduce pressure.
- Incorrect Pipe Sizing: Pipes too small to handle water flow.
- Inefficient Layout: Inequitable distribution of sprinkler heads.
Signs of Design Flaws:
- Some zones have noticeably weaker pressure
- Uneven water distribution
- Zones do not cover areas uniformly
| Design Issue | Description | Solution |
| Too Many Heads per Zone | Excessive sprinkler heads reduce pressure | Rezone to distribute heads evenly |
| Incorrect Pipe Sizing | Pipes too small to handle flow | Use appropriately sized pipes |
| Inefficient Layout | Uneven distribution of sprinkler heads | Redesign system layout for optimal coverage |
Summary Table of Common Causes
| Cause | Description | Signs | Solution |
| Clogged Sprinkler Heads | Debris, minerals, insects block heads | Uneven spray, weak flow, heads not popping up | Clean heads regularly |
| Pipe Leaks or Breaks | Leaks due to roots, ground movement, aging | Wet spots, pooling, hissing sounds | Repair or replace damaged pipes |
| Valve Issues | Partially closed, damaged, or malfunctioning | No flow, inconsistent pressure, clicking/humming | Open, repair, or replace valves |
| Pressure Regulator Issues | Incorrect settings, internal wear, blockages | Low/fluctuating pressure, visible damage/debris | Adjust, clean, or replace regulator |
| Zoning/Design Flaws | Too many heads, incorrect pipe sizing, layout | Weak pressure, uneven distribution, poor coverage | Rezone, resize pipes, redesign system layout |
Understanding these common causes and their solutions will help you effectively diagnose and fix low water pressure issues in your sprinkler system, ensuring a healthy and well-maintained lawn.
Diagnosing the Problem
Diagnosing low water pressure in one sprinkler zone involves a systematic approach to identify and address the underlying issues. Here, we provide detailed methods for visual inspection, pressure testing, and professional assessment, along with helpful tables for quick reference.
Visual Inspection
Performing a thorough visual inspection is the first step in diagnosing low water pressure. This process helps you identify obvious issues like clogged sprinkler heads, visible leaks, and malfunctioning components.
Steps for Visual Inspection:
- Turn On the Sprinkler System: Activate the system to observe water flow and coverage in each zone.
- Inspect Sprinkler Heads: Look for weak water flow, uneven spray patterns, or no water coming out. Check for dirt, debris, or damage.
- Check for Leaks: Walk along the irrigation lines and look for wet spots, pooling water, or areas of unusually green grass, which may indicate a leak.
- Examine Valves and Connectors: Ensure valves are fully open and look for signs of wear or damage in connectors and joints.
- Observe Pressure at Each Zone: Compare the performance of each zone to identify discrepancies in water pressure.
| Step | Action | Tools Needed |
| Turn On Sprinkler System | Activate system to observe water flow | Sprinkler controller |
| Inspect Sprinkler Heads | Check for weak flow, debris, or damage | Visual inspection |
| Check for Leaks | Look for wet spots or pooling water | Visual inspection |
| Examine Valves & Connectors | Ensure valves are open, check for damage | None |
| Observe Pressure | Compare performance across zones | None |
Pressure Testing
Pressure testing helps quantify the water pressure in each zone and identify areas with significant drops. This test requires specific tools and a methodical approach.
Steps for Pressure Testing:
- Gather Tools: You will need a pressure gauge, a hose bib, or a pressure test port.
- Attach the Pressure Gauge: Connect the gauge to a sprinkler head, hose bib, or a dedicated test port in the affected zone.
- Turn On the Water Supply: Activate the zone to be tested.
- Read the Pressure Gauge: Record the pressure reading. Normal pressure should be between 30-50 psi.
- Compare Readings: Test multiple zones to compare readings and identify discrepancies.
- Interpret Results: Low readings indicate potential issues such as leaks, clogs, or regulator problems.
| Step | Action | Tools Needed |
| Gather Tools | Prepare pressure gauge and test ports | Pressure gauge, hose bib |
| Attach Pressure Gauge | Connect gauge to sprinkler head or test port | Pressure gauge |
| Turn On Water Supply | Activate the zone being tested | Sprinkler controller |
| Read Pressure Gauge | Record the pressure reading | Pressure gauge |
| Compare Readings | Test and compare multiple zones | Pressure gauge |
| Interpret Results | Identify zones with low pressure | Pressure gauge, analysis |
Professional Assessment
In some cases, issues may be complex or beyond the scope of a homeowner’s abilities. A professional assessment ensures thorough diagnosis and effective solutions.
When to Call a Professional:
- Persistent Low Pressure: If you’ve tried basic troubleshooting and the issue persists.
- Complex System Issues: For problems involving major system redesigns or extensive pipework.
- Advanced Diagnosis Required: When specialized tools or expertise is needed to identify the problem.
- Warranty and Safety Concerns: To ensure repairs are covered by warranty and safety standards are met.
| Scenario | Reason to Call a Professional | Benefits |
| Persistent Low Pressure | Basic troubleshooting fails | Expert diagnosis and repair |
| Complex System Issues | Major redesigns or extensive pipework | Comprehensive solutions |
| Advanced Diagnosis Required | Need for specialized tools or expertise | Accurate problem identification |
| Warranty and Safety Concerns | Ensure warranty coverage and safety compliance | Professional standards and warranty |
Additional Diagnostic Tools and Techniques
For more advanced diagnostics, additional tools and techniques can be employed.
Flow Meters
Flow meters measure the volume of water flowing through your sprinkler system, providing detailed data on water usage and identifying inefficiencies.
| Tool | Purpose | When to Use |
| Flow Meter | Measure water volume and detect inefficiencies | When detailed water usage data is needed |
Soil Moisture Sensors
Soil moisture sensors help determine if low pressure is causing insufficient watering by measuring the moisture content in the soil.
| Tool | Purpose | When to Use |
| Soil Moisture Sensor | Measure soil moisture content | To verify if low pressure affects watering effectiveness |
By following these detailed diagnostic steps, you can effectively identify and address the causes of low water pressure in your sprinkler system. Regular inspection and testing will ensure your system operates efficiently, keeping your lawn and garden healthy and well-watered.
Steps to Diagnose the Low Water Pressure Problem
Diagnosing low water pressure in one sprinkler zone involves a systematic approach to identify and address the root cause. Below, we outline detailed steps to diagnose this issue effectively, including relevant tables to guide you through the process.
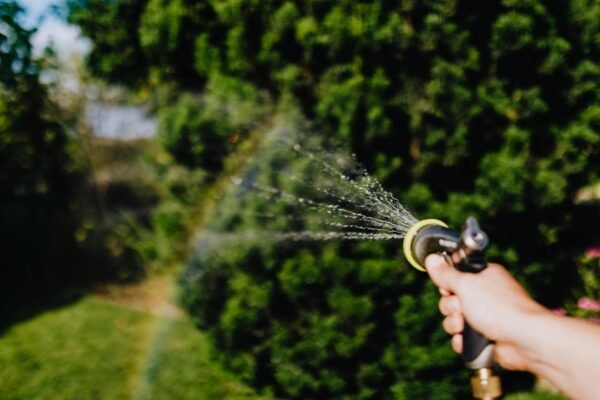
Image by Karolina Grabowska from pexels
Step 1: Visual Inspection
A visual inspection is the first step in diagnosing low water pressure issues. This involves checking the sprinkler heads, valves, and visible pipes for any obvious signs of damage or blockage.
What to Look For:
- Sprinkler Heads: Check for clogging, damage, or misalignment.
- Valves: Inspect for leaks, partial closure, or visible damage.
- Pipes: Look for signs of leaks, such as wet spots or pooling water.
| Component | Inspection Focus | Possible Issues |
| Sprinkler Heads | Clogging, damage, misalignment | Weak or uneven spray, heads not popping up |
| Valves | Leaks, partial closure, damage | Reduced flow, inconsistent pressure |
| Pipes | Leaks, wet spots, pooling water | Water leakage, reduced pressure in the zone |
Step 2: Pressure Testing
Pressure testing involves measuring the water pressure in the affected zone to determine if it falls within the normal range. This step helps identify whether the issue is due to pressure loss or other factors.
Tools Needed:
- Pressure Gauge: A device to measure the water pressure.
- Hose Bib or Faucet: An access point to attach the pressure gauge.
Steps to Perform Pressure Testing:
- Attach the Pressure Gauge: Connect the pressure gauge to the hose bib or faucet nearest to the affected zone.
- Turn on the Water: Open the water supply to allow water to flow through the gauge.
- Read the Gauge: Note the pressure reading on the gauge. The typical range for sprinkler systems is 30-50 psi.
| Pressure Range | Interpretation |
| 30-50 psi | Normal pressure, indicating other issues |
| < 30 psi | Low pressure, indicating potential leaks or blockages |
| > 50 psi | High pressure, indicating potential regulator issues |
Step 3: Checking for Leaks
Leaks in the irrigation system can cause significant pressure drops. Checking for leaks involves both a visual inspection and listening for unusual sounds.
Signs of Leaks:
- Wet Spots: Unexplained wet areas in the lawn.
- Pooling Water: Accumulation of water where it shouldn’t be.
- Hissing Sounds: Sound of water escaping from a pipe or joint.
| Leak Indicator | Description | Location |
| Wet Spots | Unusual wet areas on the lawn | Along the irrigation lines |
| Pooling Water | Water accumulating in specific areas | Near valves, pipes, or sprinkler heads |
| Hissing Sounds | Audible indication of water escaping | Near underground pipes or valve boxes |
Step 4: Inspecting Valves
Valves control the flow of water to each zone. Inspecting them ensures they are fully open and functioning correctly.
Valve Inspection Checklist:
- Manual Operation: Turn the valve on and off manually to check for proper operation.
- Electrical Function: For electric valves, check the wiring and solenoid functionality.
- Valve Condition: Look for signs of wear, corrosion, or damage.
| Valve Issue | Symptom | Action |
| Partially Closed Valve | Reduced water flow | Fully open the valve |
| Electrical Malfunction | Zone not activating or inconsistent flow | Inspect and repair wiring or solenoid |
| Wear and Corrosion | Leaks or improper sealing | Replace the valve |
Step 5: Checking the Pressure Regulator
The pressure regulator maintains consistent water pressure. Issues with the regulator can lead to both low and high-pressure problems.
Regulator Inspection Steps:
- Visual Check: Inspect the regulator for visible damage or debris.
- Pressure Adjustment: Use the adjustment screw to set the pressure within the optimal range (30-50 psi).
- Testing: Perform a pressure test after adjusting to ensure proper settings.
| Regulator Issue | Symptom | Solution |
| Incorrect Settings | Pressure too low or too high | Adjust to correct pressure range |
| Internal Wear | Inconsistent pressure | Replace the regulator |
| Blockages | Reduced or no water flow | Clean or replace the regulator |
Step 6: Evaluating System Design and Zoning
Improper system design or zoning can lead to uneven water pressure distribution. Evaluating the layout can help identify design flaws.
Factors to Consider:
- Number of Heads per Zone: Too many heads can reduce pressure.
- Pipe Sizing: Ensure pipes are appropriately sized for the water flow.
- Layout Efficiency: Check for an efficient arrangement of sprinkler heads.
| Design Factor | Impact | Solution |
| Number of Heads per Zone | Excessive heads reduce pressure | Rezone to distribute heads evenly |
| Pipe Sizing | Small pipes restrict water flow | Use appropriately sized pipes |
| Layout Efficiency | Inefficient layout causes uneven coverage | Redesign system layout for optimal coverage |
Summary of Diagnostic Steps
Following these detailed steps will help identify and resolve low water pressure issues in your sprinkler system, ensuring efficient operation and healthy lawn growth.
| Diagnostic Step | Objective | Outcome |
| Visual Inspection | Identify obvious signs of damage or blockage | Preliminary diagnosis and action steps |
| Pressure Testing | Measure water pressure in affected zone | Determine if pressure is within normal range |
| Checking for Leaks | Identify and locate leaks in the system | Repair leaks to restore pressure |
| Inspecting Valves | Ensure valves are fully operational | Repair or replace faulty valves |
| Checking Pressure Regulator | Ensure consistent water pressure | Adjust or replace regulator as needed |
| Evaluating System Design | Identify and correct design flaws | Optimize system layout for even pressure |
By following these comprehensive steps, you can effectively diagnose and address low water pressure problems in your sprinkler system, ensuring optimal performance and a healthy, well-maintained lawn.
Solutions and Fixes
When dealing with low water pressure in one sprinkler zone, it’s crucial to identify and address the root cause. Here, we provide detailed solutions and fixes for common issues, along with tables for quick reference.
Cleaning Sprinkler Heads
Clogged sprinkler heads are a frequent cause of low water pressure. Regular maintenance can prevent clogs and ensure efficient operation.
Step-by-Step Guide to Cleaning Sprinkler Heads:
- Turn Off the Water Supply: Shut off the system to avoid water wastage and potential injury.
- Remove the Sprinkler Head: Unscrew the head from the riser or pop-up body.
- Inspect for Debris: Check for dirt, debris, or mineral buildup.
- Clean the Nozzle and Filter: Use a small brush, needle, or water to clean the nozzle and filter screen.
- Reassemble and Test: Reattach the sprinkler head and turn on the water to ensure proper flow.
| Step | Action | Tools Needed |
| Turn Off Water Supply | Shut off the water system | None |
| Remove Sprinkler Head | Unscrew from riser or pop-up body | Wrench (if needed) |
| Inspect for Debris | Look for dirt or mineral buildup | Visual inspection |
| Clean Nozzle & Filter | Brush or flush with water | Small brush, needle, water |
| Reassemble & Test | Reattach and check water flow | None |
Repairing or Replacing Pipes
Leaks or breaks in pipes can drastically reduce water pressure. Here’s how to repair or replace damaged pipes.
Steps for Repairing Minor Leaks:
- Locate the Leak: Identify wet spots or pooling water.
- Turn Off the Water Supply: Shut off the main supply to prevent further leakage.
- Expose the Pipe: Dig around the area to access the pipe.
- Repair the Leak: Use pipe tape, clamps, or sealant for small leaks.
- Test the System: Turn the water back on and check for leaks.
Steps for Replacing Damaged Pipes:
- Cut Out the Damaged Section: Use a pipe cutter to remove the broken part.
- Measure and Cut New Pipe: Ensure the new section matches the old one.
- Connect the New Pipe: Use couplings to join the new piece with the existing pipe.
- Secure and Test: Tighten connections and test the system.
| Step | Action | Tools Needed |
| Locate the Leak | Identify signs of leakage | Visual inspection |
| Turn Off Water Supply | Shut off main water supply | None |
| Expose the Pipe | Dig around the leak area | Shovel, trowel |
| Repair Minor Leak | Apply tape, clamps, or sealant | Pipe tape, clamps, sealant |
| Cut Out Damaged Section | Remove broken pipe section | Pipe cutter |
| Measure and Cut New Pipe | Ensure new pipe fits | Measuring tape, pipe cutter |
| Connect New Pipe | Use couplings to join new section | Couplings, wrench |
| Secure and Test | Tighten connections and test system | Wrench, water supply |
Adjusting or Replacing Valves
Valves that are partially closed or faulty can restrict water flow. Proper adjustment or replacement can restore normal pressure.
Steps to Adjust or Replace Valves:
- Inspect the Valve: Check for visible damage or improper settings.
- Open the Valve Fully: Ensure it is fully open to allow maximum water flow.
- Test the System: Check if the water pressure improves.
- Replace Faulty Valves: If adjustment doesn’t help, replace the valve.
| Step | Action | Tools Needed |
| Inspect the Valve | Look for damage or incorrect settings | Visual inspection |
| Open Valve Fully | Ensure valve is fully open | None |
| Test the System | Check for improved water pressure | None |
| Replace Faulty Valve | Install new valve if needed | Wrench, new valve |
Maintaining Pressure Regulators
Pressure regulators ensure consistent water pressure. Malfunctions can lead to pressure issues that need timely maintenance.
Steps for Maintaining Pressure Regulators:
- Inspect the Regulator: Look for signs of wear or malfunction.
- Clean or Replace: Clean any debris or replace the regulator if faulty.
- Adjust Settings: Ensure the regulator is set to the optimal pressure range (30-50 psi).
- Test the System: Verify that water pressure is consistent across all zones.
| Step | Action | Tools Needed |
| Inspect the Regulator | Look for wear or malfunction | Visual inspection |
| Clean or Replace | Remove debris or replace unit | Small brush, new regulator |
| Adjust Settings | Set to optimal pressure range | Pressure gauge |
| Test the System | Check for consistent pressure | None |
Redesigning the System
Improper system design or zoning can cause low water pressure. Redesigning the layout can enhance efficiency.
Steps to Redesign the Sprinkler System:
- Evaluate Current Design: Assess the existing layout and zoning.
- Identify Problem Areas: Pinpoint zones with low pressure or poor coverage.
- Redesign Layout: Adjust the design to balance water distribution.
- Optimize Zoning: Ensure each zone has an appropriate number of sprinkler heads.
- Consult a Professional: For complex systems, seek expert advice.
| Step | Action | Tools Needed |
| Evaluate Current Design | Assess existing layout and zoning | Visual inspection, design plans |
| Identify Problem Areas | Pinpoint zones with issues | None |
| Redesign Layout | Adjust design for better distribution | Design software or manual |
| Optimize Zoning | Balance number of sprinkler heads | None |
| Consult a Professional | Seek expert advice if necessary | Contact information |
By following these detailed steps, you can address low water pressure issues in your sprinkler system effectively. Regular maintenance and proper system design are key to ensuring your lawn and garden receive adequate hydration, promoting a healthy and vibrant landscape.
Impact of Pressure on the Performance of an Irrigation System
Water pressure plays a critical role in the performance of an irrigation system. It affects everything from water distribution and efficiency to the longevity of the system components and the health of the plants being watered. This section explores the various ways pressure impacts irrigation system performance, supported by detailed explanations and relevant tables.
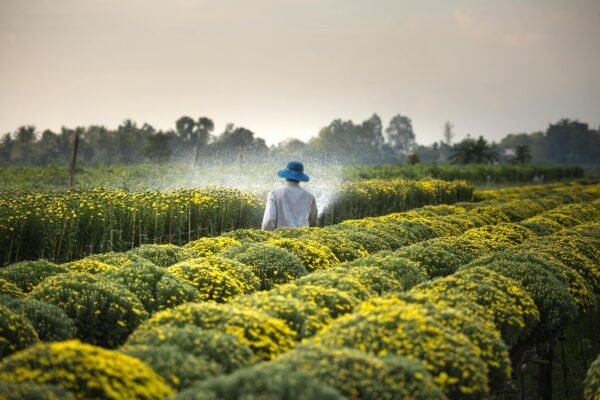
Image by Quang Nguyen Vinh from pexels
Effects on Water Distribution
The pressure within an irrigation system determines how well water is distributed across the coverage area. Proper pressure ensures that each sprinkler head delivers water evenly, maintaining consistent soil moisture levels and promoting uniform plant growth.
Optimal vs. Improper Water Distribution:
| Pressure Level | Distribution Quality | Impact on Lawn |
| Proper Pressure | Uniform | Even watering, healthy and consistent growth |
| Low Pressure | Uneven | Dry spots, inadequate coverage |
| High Pressure | Mist and runoff | Overwatering in some areas, water wastage |
- Proper Pressure (30-50 psi): Ensures that water is evenly distributed, providing consistent moisture across the lawn.
- Low Pressure (<30 psi): Leads to weak water flow and uneven coverage, resulting in dry patches and stressed plants.
- High Pressure (>50 psi): Causes misting and runoff, leading to inefficient watering and water wastage.
Effects on Water Efficiency
Efficiency is a major concern for any irrigation system, and maintaining proper pressure is key to optimizing water usage. Proper pressure minimizes water waste and ensures that water is delivered exactly where it’s needed.
Water Efficiency at Different Pressure Levels:
| Pressure Level | Water Usage | Efficiency |
| Proper Pressure | Optimal | High efficiency, minimal waste |
| Low Pressure | Increased usage | Inefficient, potential overwatering |
| High Pressure | Excessive usage, runoff | Low efficiency, significant water waste |
- Proper Pressure: Results in optimal water usage, minimizing waste and ensuring that plants receive the right amount of water.
- Low Pressure: Can lead to increased water usage as the system compensates for inadequate coverage by running longer.
- High Pressure: Causes water to be sprayed too forcefully, leading to runoff and significant water waste.
Effects on System Components
Maintaining proper water pressure is crucial for the longevity and reliability of irrigation system components. Both high and low pressure can cause damage to the system, leading to increased maintenance costs and system downtime.
Impact on System Components:
| Pressure Level | Component Impact | Maintenance Implications |
| Proper Pressure | Minimal wear, extended lifespan | Lower maintenance costs, fewer repairs |
| Low Pressure | Overworking of system components | More frequent repairs, potential failures |
| High Pressure | Burst pipes, damaged sprinkler heads | High repair costs, increased maintenance |
- Proper Pressure: Ensures minimal wear and tear on components, extending their lifespan and reducing maintenance needs.
- Low Pressure: Causes the system to work harder, leading to overheating and potential component failure.
- High Pressure: Can result in burst pipes, damaged sprinkler heads, and increased wear on valves and fittings.
Effects on Plant Health
The health of the plants in your lawn and garden is directly influenced by the performance of your irrigation system, which in turn is affected by water pressure. Proper pressure ensures that plants receive the right amount of water, promoting healthy growth and reducing the risk of disease.
Plant Health at Different Pressure Levels:
| Pressure Level | Plant Growth | Disease Risk |
| Proper Pressure | Optimal, consistent growth | Low risk of water-related diseases |
| Low Pressure | Stunted, inconsistent growth | High risk due to drought stress |
| High Pressure | Overwatered, potential root rot | Increased risk of waterlogging and diseases |
- Proper Pressure: Delivers consistent moisture, promoting optimal plant growth and reducing disease risk.
- Low Pressure: Results in inadequate watering, leading to drought stress and stunted growth.
- High Pressure: Can cause overwatering, leading to root rot and increased susceptibility to diseases.
Summary of Pressure Impact
Maintaining the correct water pressure in an irrigation system is essential for ensuring:
- Effective Water Distribution: Even and consistent watering across the lawn.
- Water Efficiency: Minimal waste and optimal use of water resources.
- System Durability: Reduced wear and tear on components, leading to fewer repairs and lower maintenance costs.
- Healthy Plant Growth: Adequate and consistent watering, promoting vigorous growth and reducing disease risk.
| Aspect | Benefit | Impact |
| Water Distribution | Even coverage | Healthy, lush lawn |
| Water Efficiency | Optimal usage, minimal waste | Positive environmental impact, cost savings |
| System Durability | Less wear and tear, extended lifespan | Lower maintenance costs |
| Plant Health | Adequate watering, reduced disease risk | Healthy, vigorous plant growth |
In conclusion, proper water pressure is the cornerstone of an efficient and effective irrigation system. Regular monitoring and maintenance are necessary to ensure that the system operates within the recommended pressure range, thereby enhancing water distribution, efficiency, system longevity, and plant health. By prioritizing proper pressure management, you can achieve a well-maintained and thriving lawn and garden.
Frequently Asked Questions (FAQs)
Why Intermittent Low Pressure in One Zone Only?
Intermittent low pressure in one sprinkler zone can be caused by several factors. It might be due to a partially closed or malfunctioning valve that occasionally restricts water flow. Clogged sprinkler heads can also result in inconsistent pressure, as debris may temporarily block water output. Another possibility is a small leak in the irrigation pipes that becomes more significant at times, reducing the pressure sporadically. Pressure regulators, if not functioning properly, can lead to fluctuating water pressure. Additionally, water supply issues from the main line or municipal water supply can cause intermittent pressure drops. To address this, perform a thorough inspection of valves, heads, and pipes, and check the pressure regulator and water supply consistency.
How to Determine the Cause of Low Pressure on a Zone
Determining the cause of low pressure in a sprinkler zone involves a systematic approach. Start with a visual inspection to identify any obvious leaks, damaged sprinkler heads, or closed valves. Next, conduct a pressure test using a pressure gauge at the nearest hose bib to the affected zone; this will help confirm if the pressure is below the optimal range of 30-50 psi. Check for clogged sprinkler heads by removing and cleaning them. Inspect the valves for proper operation and ensure they are fully open. Examine the pipes for any signs of leaks or damage. If no issues are found, check the pressure regulator and adjust it if necessary. If the problem persists, consider consulting a professional for a more detailed assessment.
How Does Irrigation System Design Impact Pressure?
Irrigation system design significantly impacts water pressure. A well-designed system ensures that water is distributed evenly across all zones, maintaining consistent pressure. Key design elements include the number of sprinkler heads per zone, the size of the pipes, and the layout of the system. Too many sprinkler heads on a single zone can reduce pressure, as the water flow is divided among more outlets. Properly sized pipes ensure that water can flow freely without excessive resistance, which can cause pressure drops. Efficient layout minimizes the distance water must travel, reducing friction losses. Poor design, on the other hand, leads to uneven pressure distribution, with some zones receiving inadequate water, affecting plant health and system efficiency.
How Much Water Can I Save with a High-Pressure System?
Using a high-pressure system doesn’t necessarily save water; in fact, it can often lead to water wastage. When water pressure is too high, it can cause misting and runoff, where water is lost to evaporation or flows away from the targeted area. However, if you manage and regulate high pressure effectively using pressure regulators and proper system design, you can enhance the efficiency of your irrigation system. By maintaining the optimal pressure range (30-50 psi), you ensure that water is applied evenly and adequately, reducing wastage and ensuring that plants receive the necessary moisture. This balanced approach can lead to water savings of up to 20-50% compared to systems operating at incorrect pressure levels, making your irrigation both cost-effective and environmentally friendly.
How do I perform a pressure test on my sprinkler system?
To perform a pressure test on your sprinkler system, you’ll need a pressure gauge. Attach the gauge to a hose bib or directly to a sprinkler head in the affected zone. Turn on the water and read the pressure on the gauge. Compare the reading to the normal pressure range (30-50 psi). If the pressure is outside this range, it indicates an issue that needs addressing, such as leaks, clogs, or regulator problems. Regular pressure testing helps ensure your system operates efficiently and identifies potential problems early.
Can poor system design lead to low water pressure in a specific zone?
Yes, poor system design can lead to low water pressure in a specific zone. Improper zoning, where too many sprinkler heads are connected to one zone, can cause uneven water distribution and reduced pressure. Additionally, inadequate pipe sizing or inefficient layout can contribute to pressure issues. Ensuring that the sprinkler system is designed and zoned correctly according to the landscape’s needs is crucial for maintaining consistent water pressure. Consulting with a professional can help optimize the system design for better performance.
What role does a pressure regulator play in a sprinkler system?
A pressure regulator plays a crucial role in maintaining consistent water pressure throughout a sprinkler system. It ensures that the water pressure stays within the optimal range (typically 30-50 psi) to prevent damage to the system and ensure efficient watering. If the pressure regulator malfunctions, it can lead to either too high or too low water pressure, affecting the performance of the sprinkler heads. Regular maintenance and timely replacement of faulty regulators are essential for the smooth operation of the irrigation system.
What causes low water pressure in only one zone of a sprinkler system?
Low water pressure in one sprinkler zone can be caused by several issues, including clogged sprinkler heads, leaks or breaks in the irrigation pipes, malfunctioning valves, or problems with the pressure regulator. Additionally, poor system design or improper zoning can result in uneven water distribution. Identifying the root cause involves inspecting the sprinkler heads for debris, checking for visible leaks, ensuring valves are fully open, and testing the pressure regulator. Addressing these potential issues can help restore proper water pressure to the affected zone.
Conclusion
In conclusion, understanding why does one sprinkler zone have low pressure? is crucial for maintaining a healthy and efficient irrigation system. By following the steps outlined in this guide, you can diagnose and address low water pressure issues effectively. Remember to conduct visual inspections, perform pressure testing, check for leaks, inspect valves and regulators, and evaluate system design. With proper maintenance and attention to detail, you can ensure optimal water pressure in your sprinkler system, leading to uniform water distribution, water conservation, and healthy plant growth. Don’t let low pressure dampen your lawn’s potential—take action today to keep your sprinkler system running smoothly and your garden thriving.